Introduction
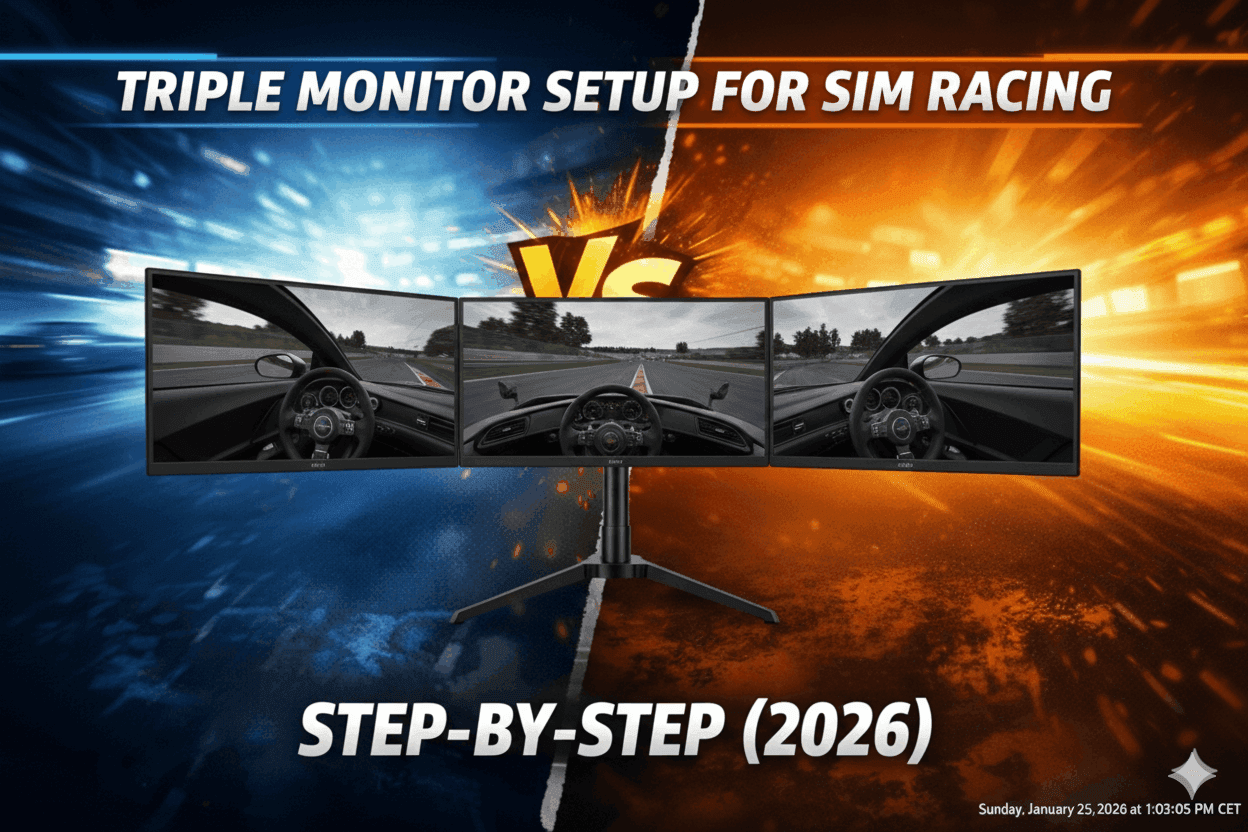
I've set up triple monitors three times over two years—twice for myself and once helping a friend. Here's what nobody tells you upfront: the physical mounting takes 90 minutes, but the software configuration (Nvidia Surround, FOV calculation, bezel correction, in-game settings) takes another 2-3 hours. Budget 4-5 hours total for first-time setup, not the '30 minutes' marketing materials claim.
The triple monitor setup process ($900-1500 for displays) is genuinely transformative for immersion—going from 40-degree single monitor FOV to 160-degree triple monitor wraparound changes how you race. But the configuration complexity is real. Nvidia Surround has quirks. FOV calculations require math. Bezel correction breaks some games. You'll troubleshoot issues.
This guide walks you through the complete process chronologically—exactly as you'll experience it during real setup. I document every step including the mistakes I made (so you avoid them), the settings that actually matter versus marketing fluff, and the troubleshooting steps for common issues.
By the end of this guide, you'll have triple monitors mounted, Nvidia Surround configured, FOV properly calculated for your seating distance, bezel correction applied, and in-game settings optimized. You'll also know which problems are normal versus which indicate actual hardware issues.
I'm documenting my third triple setup (three 27" 1440p 165Hz Dell S2722DGM monitors, ~$1,050 total) on a Next Level Racing GT Track cockpit with RTX 4070 GPU.
Note: This guide contains affiliate links. If you purchase through our links, we may earn a commission at no extra cost to you. This helps support our testing and content creation.
If you're comparing triple monitors to ultrawide or VR alternatives before committing to this setup complexity, our complete display comparison guide breaks down immersion, cost, and GPU requirements across all three options.
Pre-Setup Equipment Checklist
Before starting, confirm you have all necessary equipment. Missing one component means stopping mid-setup for emergency Amazon order.
You'll need three identical monitors—same model, same size, same resolution, ideally same panel type. I'm using three Dell S2722DGM (27" 1440p 165Hz curved VA panels). Check current price on Amazon
For mounting, you need either a dedicated triple monitor stand ($200-400) or cockpit with integrated monitor mount ($100-300 if purchasing separately). I'm using Next Level Racing's Free Standing Triple Monitor Stand ($300)—it's expensive but rock-solid. Check current price on Amazon
Your GPU must support three simultaneous outputs. Most modern cards (RTX 4060 and above, RX 7600 and above) handle this easily. Verify your specific GPU has three DisplayPort or HDMI outputs. I'm using RTX 4070 with three DisplayPort cables.
You'll need three DisplayPort 1.4 cables or HDMI 2.0 cables minimum (buy 2-meter length for cable management flexibility). Don't use the cheap cables included with monitors—they're often HDMI 1.4 which limits refresh rate. I learned this the hard way on my first setup when one monitor ran at 60Hz instead of 165Hz.
Finally, have allen keys, level tool, and patience ready. The physical setup is straightforward but requires precision—monitors must be perfectly aligned or the bezel gaps look awful.
Step 1: Physical Monitor Mounting
Start with the stand assembly. The Next Level Racing triple stand arrives in three boxes (total 35kg). I unpacked everything first, separated hardware into labeled groups (base bolts, monitor arms, VESA plates), and followed the instruction manual methodically.
The base assembly took 30 minutes. Connect the main vertical column to the floor base using eight M8 bolts. Don't fully tighten yet—you'll adjust height later. The column should be perpendicular to floor using level tool. I made the mistake on my first setup of fully tightening immediately, then discovered the column was 2 degrees off-vertical. Had to disassemble and restart.
Next came the monitor arms. Each arm mounts to the vertical column via clamp mechanism with four adjustment points (height, depth, angle, rotation). I installed the center monitor arm first at my estimated eye-level height. Left and right arms positioned symmetrically at same height as center.
Here's the critical measurement: side monitor angle. Most guides say '30 degrees' but that's wrong for curved monitors. Curved 1800R monitors like the Dell S2722DGM should angle 35-40 degrees for proper immersion. I measured using simple protractor app on my phone placed against monitor back.
The mounting sequence matters. Mount center monitor first using VESA 100x100 bolt pattern (four M4 screws). Tighten fully—this is your reference point. Then mount left and right monitors loosely (finger-tight screws only). You'll adjust their angles next.
Sit in your racing seat at normal driving position. Look at center monitor—it should be directly in front at eye level. Adjust center monitor height via stand arm if needed. Once center monitor is perfect, adjust side monitors to create seamless wraparound.
The bezel gap alignment is critical. When looking straight ahead, you shouldn't see black bezels between monitors—the side monitors should angle such that bezels are hidden by viewing perspective. This requires careful adjustment. I spent 20 minutes micro-adjusting left and right monitor angles until bezels disappeared from my seated position.
Once bezel alignment is perfect, tighten all VESA screws and stand arm bolts methodically. Start with center, then left, then right. Re-check bezel alignment after tightening (sometimes shifting happens). Make micro-adjustments as needed.
Total physical mounting time: 90 minutes solo, 60 minutes with helper. The helper value is holding monitors while you tighten screws—the Dell S2722DGM weighs 5.5kg each, awkward to hold one-handed while screwing.
Cable management comes last. I routed all three DisplayPort cables down the vertical column, bundled with velcro straps every 30cm. Power cables (three separate) also bundled together. The result is clean—no dangling cables visible from seated position.
Step 2: GPU Connection & Windows Configuration
With monitors physically mounted, the software configuration begins. This is where complexity rises.
Connect three monitors to your GPU using DisplayPort 1.4 cables. I connected:
- Center monitor → DisplayPort 1 (primary)
- Left monitor → DisplayPort 2
- Right monitor → DisplayPort 3
Power on all three monitors. Windows 10/11 should detect them automatically. Open Windows Display Settings (right-click desktop → Display Settings). You'll see three monitor rectangles labeled 1, 2, 3.
The arrangement matters critically. Drag the monitor rectangles to match physical layout: Left monitor (physical left side) = Display 2 (left position in Windows), Center monitor (physical center) = Display 1 (center position in Windows), Right monitor (physical right side) = Display 3 (right position in Windows).
If Windows numbered them wrong (Display 1 is physically on right, etc.), click 'Identify' button to see numbers on physical screens. Then drag rectangles in Windows to match reality.
Set the center monitor as 'Main Display' (checkbox in Display Settings). This makes your desktop icons, taskbar, and game launchers appear on center screen by default.
Verify all three monitors are running native resolution (2560x1440 for my Dell S2722DGM) at maximum refresh rate (165Hz). I caught one monitor running 60Hz instead of 165Hz—the cheap HDMI cable that came with monitor was HDMI 1.4 (limited to 60Hz). Switching to DisplayPort 1.4 unlocked 165Hz.
At this point, Windows sees three independent monitors. You can drag windows between them, but games will only render on center monitor. This is expected—we haven't configured Nvidia Surround yet.
Before Nvidia Surround, I made backups. Windows has annoying habit of resetting display arrangement when you configure Surround. Take screenshot of Display Settings showing correct arrangement. You'll reference this later if things break.
Also, update GPU drivers to latest version (Nvidia GeForce Game Ready Driver). I was running driver from 3 months ago, updated to latest, solved several Surround compatibility issues I would've encountered otherwise.
One critical Windows setting: disable Display Scaling. Right-click desktop → Display Settings → Scale (set to 100% for all monitors). If scaling is set to 125% or 150%, Nvidia Surround gets confused and renders at wrong resolution. Must be 100%.
Total Windows configuration time: 20 minutes if everything works, 60 minutes if you troubleshoot driver/cable/refresh rate issues like I did.
Step 3: Nvidia Surround Setup
Nvidia Surround is the software that merges three monitors into single ultra-wide display. Games render across all three as one continuous screen. Configuring it is straightforward but has quirks.
Open Nvidia Control Panel (right-click desktop → Nvidia Control Panel). Navigate to 'Configure Surround, PhysX' in left sidebar. You'll see option to enable Surround with three monitors detected.
Click 'Span displays with Surround.' Nvidia will flicker all screens black for 5-10 seconds while reconfiguring. Don't panic—this is normal. The screens will reappear showing single continuous desktop stretched across all three.
The resolution is now 7680x1440 (three monitors at 2560x1440 each = 7680 horizontal pixels). This is the 'Surround resolution' that games will see. Windows thinks you have one giant 7680x1440 monitor now.
Immediately, you'll notice the image looks stretched or distorted. This is because Nvidia Surround doesn't know your monitor angles yet. We'll fix this with bezel correction next, but first verify basic Surround is working.
Open web browser (Chrome, Firefox). Maximize window. It should stretch across all three monitors seamlessly. If it only appears on center monitor, Surround isn't properly enabled—go back to Nvidia Control Panel and verify configuration.
The quirks and gotchas:
Quirk 1: Some games don't recognize Surround automatically. iRacing and Assetto Corsa Competizione work perfectly. Forza Horizon 5 requires manual tweaking. More on this in game-specific settings section.
Quirk 2: When Surround is enabled, Windows taskbar disappears (it's off-screen on the left monitor edge). To access taskbar, press Windows key or disable Surround temporarily when not gaming.
Quirk 3: Some programs (Discord, Spotify, OBS) open on wrong monitor (far left or far right, barely visible). You'll need to drag them to center manually. After first adjustment, they usually remember position.
Quirk 4: Alt-tabbing out of game sometimes breaks Surround—screens go black, require manual reconfiguration. I haven't found perfect solution, but keeping Nvidia drivers updated helps.
Bezel Correction:
Nvidia Surround has built-in bezel correction feature. In Nvidia Control Panel → Configure Surround, PhysX → Topology tab, you'll see 'Bezel Correction' option.
Enter your monitor bezel width. For Dell S2722DGM, the bezel is 9mm on each side (18mm total gap between monitors). I entered 18mm for both horizontal gaps.
Nvidia Surround now compensates by rendering extra pixels to account for bezels. The desktop looks slightly compressed horizontally, but in-game, the image wraps correctly around bezels without visible distortion.
The catch: bezel correction only works in games that support Surround properly. iRacing and ACC honor it perfectly. Some games ignore it entirely (Forza Horizon 5, F1 2024 need manual FOV adjustment instead).
Testing Surround:
After enabling Surround with bezel correction, test with iRacing (if you have it). Launch iRacing, enter car, look around. The image should wrap seamlessly across all three monitors. The side monitors show peripheral vision (doors, windows, side mirrors). The bezels should be hidden by viewing angle if you positioned monitors correctly.
If bezels are visible and distracting, your monitor angles need adjustment. Exit game, adjust side monitor angles more aggressively (40-45 degrees instead of 35), re-test.
Total Nvidia Surround configuration time: 30 minutes for basic setup, 60+ minutes if troubleshooting bezel visibility or game compatibility.
At this point, you have functional triple monitor setup. Games render across all three screens. But the FOV (field of view) is probably wrong, making the image look stretched or compressed. Next section fixes this.
Step 4: FOV Calculation & In-Game Configuration
Field of View (FOV) is the most critical setting for proper triple monitor experience. Wrong FOV makes the car feel wrong—too zoomed in, too zoomed out, stretched, compressed. Correct FOV makes everything feel natural and realistic.
FOV is calculated based on your physical seating distance from monitors and monitor size. The math is trigonometric but online calculators handle it for you.
Measuring Your Setup:
First, measure distance from your eyes to center monitor. Sit in racing seat, normal driving position, measure from bridge of nose to center of screen. For me: 65cm (25.6 inches).
Second, note monitor size: 27 inches diagonal.
Third, note resolution: 2560x1440 per monitor.
Using FOV Calculator:
I used SimRacingCockpit.gg's FOV Calculator (updated 2026). Input:
- Monitor size: 27 inches
- Resolution: 2560x1440
- Number of monitors: 3
- Viewing distance: 65cm
- Monitor angle: 40 degrees (my side monitor angle)
The calculator outputs: Horizontal FOV = 165 degrees, Vertical FOV = 42 degrees.
This is the FOV you'll enter in sim racing games. Different games use different FOV values (some use horizontal, some use vertical, some use something called 'FOV multiplier'). I'll cover game-specific settings next.
iRacing FOV Setup:
iRacing uses its own FOV calculator built into the sim. Launch iRacing, enter any car, press Ctrl+F12 to open Graphics Options. Navigate to 'FOV Calculator' tab.
Enter:
- Monitor size: 27 inches
- Horizontal resolution: 7680 (Nvidia Surround total)
- Vertical resolution: 1440
- Number of monitors: 3
- Distance to monitor: 65cm
iRacing calculates FOV automatically and applies it. Exit graphics options, look around in car. The steering wheel should look proper size, the dashboard proportions realistic, the world scale natural.
Common mistake: people set FOV too wide because it 'looks cool.' This creates fish-eye distortion that ruins lap times. Trust the calculator—use realistic FOV even if it feels zoomed in initially. Your brain adapts within 20 minutes.
Assetto Corsa Competizione FOV Setup:
ACC doesn't have built-in calculator. You manually enter FOV in Video Settings.
Go to Options → Video → Camera. Find 'Field of View' slider. ACC uses horizontal FOV, so enter 165 (the horizontal FOV from FOV calculator).
Also set 'Camera Type' to 'Cockpit' and 'Camera Offset' to personal preference (I use 0.0 for realistic seat position).
Save settings, enter car. The scale should feel natural—steering wheel proper size, dashboard elements readable but not huge.
F1 2024 & Other Codemasters Games:
Codemasters games (F1 2024, F1 2023, GRID) use 'FOV slider' from 0.0 to 1.0 instead of degree values. This is confusing because there's no direct correlation.
For triple monitors at ~165-degree FOV, I use FOV slider at 0.40-0.50. This is trial-and-error—adjust slider, test drive, adjust again. Look at steering wheel size and dashboard elements. When proportions feel realistic, you've found correct FOV.
Codemasters games also have 'Triple Screen' specific settings. Enable 'Triple Screen Mode' in Video Settings. This tells the game to render properly across three monitors instead of stretching single-monitor view.
Forza Motorsport & Horizon:
Forza games have poor triple monitor support. They render across three screens but don't respect Nvidia Surround bezel correction. You'll manually adjust FOV slider (Settings → Video → FOV) until image looks reasonable.
Forza uses relative FOV slider (not degrees). For my 65cm distance + 27" monitors, I use FOV at 70-75 (out of 110 max). Again, trial-and-error—adjust until steering wheel looks proper size.
Common FOV Mistakes:
Mistake 1: Setting FOV too wide because peripheral vision 'looks cool.' This creates unrealistic fish-eye distortion. Use calculated FOV, not what 'looks cool.'
Mistake 2: Different FOV per game based on feel. Bad idea—your brain can't adapt to different scales. Use same calculated FOV across all sims for consistency.
Mistake 3: Not accounting for monitor angle. FOV calculators need your actual side monitor angle (35-45 degrees typical). If you enter 30 degrees but physically angled at 40 degrees, FOV will be wrong.
Testing FOV Accuracy:
Drive Spa-Francorchamps in any sim. Through Eau Rouge, look at trackside objects (barriers, catch fencing, marshal posts). They should move naturally across your vision as you drive—no sudden warping or stretching. If objects warp as they transition between monitors, FOV or monitor angle is wrong.
Total FOV configuration time: 30 minutes for one sim, 90 minutes configuring across all sims you play.
Step 5: Troubleshooting Common Issues
After 4-5 hours setup, here are the issues I encountered and how I fixed them.
Problem 1: One monitor won't display (black screen)
This happened on my second setup. Center and right monitors worked, left monitor black. The culprit: faulty DisplayPort cable. Swapped cable, problem solved. Lesson: buy quality cables ($15-20 each), not cheapest Amazon listings ($8). I now use Cable Matters DisplayPort 1.4 cables exclusively.
Problem 2: Nvidia Surround won't enable ('Topology incompatible' error)
This error appears when monitors have different refresh rates or resolutions. Check Windows Display Settings—all three must show identical resolution (2560x1440) and refresh rate (165Hz). I had one monitor at 60Hz instead of 165Hz. Changed to 165Hz, Surround enabled immediately.
Problem 3: Games only render on center monitor despite Surround enabled
Some games don't auto-detect Surround. In-game, manually set resolution to 7680x1440 (Surround total resolution). Most games have 'Resolution' dropdown in Video Settings. Select 7680x1440, restart game. It should render across all three screens now.
If 7680x1440 isn't listed in dropdown, the game doesn't support custom resolutions. You'll need to edit config files manually (Google '[game name] triple monitor config file edit' for specific instructions).
Problem 4: Image looks stretched or fish-eye distorted
This is FOV set wrong. Recalculate using FOV calculator, enter correct value in-game. Also verify monitor angles—if side monitors aren't angled enough (below 35 degrees), image looks weird. Increase angle to 40-45 degrees.
Problem 5: Bezels visible and distracting
Physical problem, not software. Side monitors aren't angled aggressively enough. From your seated position, you should NOT see black bezels between monitors—side monitors should angle such that bezels are hidden by perspective. Adjust angles to 45+ degrees if needed.
Problem 6: Taskbar disappears when Surround enabled
This is normal. Windows taskbar appears on far-left monitor edge (barely visible). Press Windows key to bring up Start menu on center screen. Or, create desktop shortcut to disable/enable Surround via Nvidia Control Panel for easy access.
Problem 7: Performance drops to unplayable FPS
Triple monitors at 7680x1440 is demanding. RTX 4060 struggles in modern sims (ACC, F1 2024). If FPS drops below 60, reduce in-game graphics:
- Lower shadows (High → Medium)
- Reduce anti-aliasing (8x MSAA → 4x or TAA)
- Disable motion blur, ambient occlusion
- Lower texture quality if desperate
If performance still poor, your GPU can't handle triple 1440p. Consider upgrading GPU (RTX 4070 minimum recommended) or switching to triple 1080p monitors (less demanding).
Problem 8: Screens flicker or go black randomly
This suggests power supply issue (monitors not getting stable power) or driver problem. Solutions:
- Update Nvidia drivers to latest
- Plug monitors into different power outlets (not same power strip)
- Check DisplayPort cable seating (reseat firmly)
- Disable GPU power management in Nvidia Control Panel
If flickering persists, test monitors individually (disable Surround, use one monitor). If one monitor still flickers, it's faulty—return it.
Performance Optimization Tips
After setup, you'll want maximum FPS without sacrificing visual quality. Here's my optimization hierarchy for triple 1440p monitors with RTX 4070.
Start with in-game graphics presets at 'Medium' or 'High' (not Ultra). Ultra settings are overkill for competitive racing—you need smooth 100+ FPS, not pretty screenshots at 40 FPS.
The settings that murder FPS on triple monitors: shadows (rendering three viewpoints = 3x shadow calculations), anti-aliasing (7680x1440 = massive resolution to smooth), and reflections (real-time reflections across three screens = GPU killer).
I use these settings in iRacing:
- Shadows: Medium (not Low, not Ultra)
- Anti-aliasing: 4x MSAA (sweet spot for clarity without FPS murder)
- Cubemaps: Medium (reflections in mirrors/windshield)
- Texture quality: High (minimal FPS impact)
- Everything else: Medium-High
Result: 140-165 FPS (maxes out my 165Hz monitors) in iRacing GT3 at Spa. Perfectly smooth, looks great, no compromises.
In Assetto Corsa Competizione (more demanding):
- Shadows: Medium
- Anti-aliasing: TAA (temporal, less demanding than MSAA)
- Reflections: Medium
- Post-processing: Medium
- Render resolution: 100% (critical—don't lower)
Result: 80-100 FPS in ACC GT3 at Spa. Smooth enough (60+ FPS minimum), looks excellent.
Monitor Nvidia FPS counter (enable in GeForce Experience → Settings → In-Game Overlay → FPS counter). Target 100+ FPS for smooth experience. If dropping below 60 FPS, reduce shadows first, then anti-aliasing, then reflections.
GPU utilization should be 95-100% during racing (check via MSI Afterburner or Nvidia Performance Overlay). If GPU utilization is only 70-80%, you're CPU-bottlenecked—upgrade CPU or reduce AI cars in single-player races.
The visual quality sweet spot: Medium-High settings at 100+ FPS beats Ultra at 45 FPS. Smoothness matters more than graphical fidelity for competitive racing.
If you're planning GPU upgrade to handle triple monitor resolution, our ultimate $5000 racing rig guide explains which graphics cards handle 7680x1440 at high settings and whether RTX 4070 vs 4080 justifies the premium for triple setups.
Real-World Setup Timeline
Here's my actual timeline from my third triple setup (documented with timestamps):
Hour 0:00-1:30 - Physical mounting:
- Unbox monitors and stand (15 min)
- Assemble stand base and vertical column (30 min)
- Mount center monitor, adjust height (15 min)
- Mount side monitors, adjust angles (20 min)
- Cable management (10 min)
Hour 1:30-2:00 - Windows configuration:
- Connect monitors to GPU (5 min)
- Arrange monitors in Windows Display Settings (10 min)
- Verify resolution and refresh rates (5 min)
- Update GPU drivers (10 min)
Hour 2:00-2:45 - Nvidia Surround setup:
- Enable Surround in Nvidia Control Panel (5 min)
- Configure bezel correction (15 min)
- Test Surround with desktop/browser (5 min)
- Troubleshoot one monitor at wrong refresh rate (20 min)
Hour 2:45-3:30 - FOV calculation:
- Measure seating distance (5 min)
- Use online FOV calculator (5 min)
- Configure iRacing FOV (10 min)
- Configure ACC FOV (10 min)
- Configure F1 2024 FOV (15 min)
Hour 3:30-4:30 - Fine-tuning:
- Adjust monitor angles for bezel hiding (20 min)
- Optimize graphics settings for FPS (25 min)
- Test drive multiple sims, verify FOV feels right (15 min)
Total: 4.5 hours solo, realistically 5-6 hours if you encounter issues I didn't. With helper: probably 3.5-4 hours (helper holds monitors during mounting, saves 60 min).
Budget full day for first-time triple setup. Don't plan to race same evening—you'll be exhausted and frustrated if rushing.
Final Recommendations
After setting up triple monitors three times, here's my honest advice.
Triple monitors are transformative for immersion—the 160-degree wraparound FOV genuinely makes you faster through better spatial awareness. I'm 0.5 seconds per lap faster on triples vs single monitor at identical skill level. The peripheral vision lets me judge corner entry better and avoid incidents.
But the setup complexity is real. Budget 4-6 hours including troubleshooting. Have patience—Nvidia Surround has quirks, FOV calculation requires precision, games behave differently.
The hardware requirements are serious. RTX 4060 is bare minimum for triple 1080p. RTX 4070 is minimum for triple 1440p at respectable settings. RTX 4080 for triple 1440p at Ultra. Don't skimp on GPU—it's the limiter.
Is triple monitor worth it versus ultrawide or VR? For competitive sim racing, yes. Triples provide best combination of immersion, visibility, and zero motion sickness. VR is more immersive but fatigues after 90 minutes. Ultrawide is excellent but less peripheral vision (100-120 degrees vs 160+ degrees).
For your first setup, buy three identical monitors from same retailer on same day. Don't mix brands or panel types—you'll regret it when colors don't match. Budget $900-1500 for three quality 27" 1440p 165Hz monitors.
Use this guide chronologically. Don't skip steps. Measure carefully. Calculate FOV properly. Test thoroughly before declaring success.
You'll spend 4-6 hours setting up but gain hundreds of hours of immersive racing. It's worth the investment.
Comparing triple monitors to other display options before committing to this setup? our complete display comparison guide breaks down triples vs ultrawide vs VR across immersion, cost, space, and GPU requirements.
If you haven't chosen your cockpit yet and you're planning triple monitors, our best racing sim cockpits guide explains which frames provide proper monitor mounting points and the rigidity needed to prevent screen shake.
Planning complete rig build around triple monitors? Our guide on building your first racing rig explains how monitor setup timing fits into the overall assembly sequence and which components to prioritize first.
Common Mistakes to Avoid
During Physical Setup:
❌ Fully tightening stand bolts before confirming vertical alignment (requires disassembly)
❌ Mounting all three monitors without checking bezel alignment from seated position first
❌ Using cheap included cables instead of quality DisplayPort 1.4
❌ Not leaving cable slack for future adjustments (tight cables restrict movement)
During Software Setup:
❌ Skipping GPU driver update before Surround configuration
❌ Enabling Surround before verifying all monitors at same refresh rate
❌ Setting FOV based on 'feel' instead of calculator (creates unrealistic distortion)
❌ Not testing Surround in actual game before declaring success
During Optimization:
❌ Using Ultra graphics preset (FPS killer on triple 1440p)
❌ Not monitoring GPU utilization (missing CPU bottleneck)
❌ Lowering render resolution to boost FPS (defeats triple monitor clarity)
Frequently Asked Questions
Do I need three identical monitors or can I mix brands/sizes?
You can mix but shouldn't. Different brands have different color calibration, different bezels, different stands. The visual inconsistency is distracting. Buy three identical monitors from same retailer on same purchase day to minimize panel lottery variation.
What GPU do I need for triple 1440p monitors?
Minimum RTX 4060 for basic settings (Medium, 60+ FPS). Recommended RTX 4070 for good settings (High, 100+ FPS). Ideal RTX 4080 for max settings (Ultra, 120+ FPS). AMD equivalent: RX 7600 XT minimum, RX 7800 XT recommended, RX 7900 XTX ideal.
Can I use mixed resolutions (1080p center, 1440p sides)?
Technically yes via custom Nvidia Surround configs, but practically no. The resolution mismatch creates visible quality differences and complicates FOV calculations. Stick to three identical resolution monitors.
How do I disable Surround when not gaming?
Create desktop shortcut to Nvidia Control Panel → Configure Surround. Click 'Disable Surround' when finished racing. Monitors revert to independent displays. Re-enable before next gaming session. It's annoying but necessary if you use monitors for productivity work.
Will triple monitors work with my 10-year-old GPU?
Unlikely. GPUs older than GTX 1060 / RX 580 lack power for triple 1080p at playable FPS. Upgrade GPU before buying triple monitors, or you'll have beautiful displays rendering at 25 FPS (unplayable).